Subscribe with Dombox
Subscribe to e-mail newsletters with just One-Click.
Have you ever signed up for a newsletter in 3rd party websites? It usually looks something like this. A name field. An email field. And a Submit button. Title of this form usually be "Subscribe to our Newsletter". When you fill the form and submit, the process is called Single Opt-In.
Now some newsletter services require a confirmation to comply with antispam laws. So you will get a confirmation email. If you confirm by clicking the link, then you become a subscriber. This confirm process is called Double Opt-In.
Think about it. What's stopping someone from submitting your email address in a newsletter subscription form. In order to prevent email misuse, a website requires the Double Opt-In process. Otherwise, the website may be spamming people.
To make this process easier, We are introducing a button called "Subscribe with Dombox". Think of it like a Facebook Like or Twitter Follow button you see on websites and apps, but for email newsletter subscription. So its a "One-Click Subscribe" button.
When you click the "Telescribe" button, a dombox will be created for the domain.
"Subscribe with Dombox" button is not an alternative to 3rd party newsletter services like MailChimp. You still need to depend on 3rd party newsletter services. "Subscribe with Dombox" button only makes the subscription process easier.
Keep in mind, if a box already exists for that domain, then only the subscription status will be changed.
Demo
Add Button
The following two lines of code will display our "Subscribe with Dombox" button in your website or app.
Add Sublet
Sublet stands for "Subscription Outlet". Sublet is also known as "Subway" in our system. Subway stands for "Subscription Gateway".
At the moment, sublet is being used only to POST events to "webhook" endpoints. So sublets are nothing but webhook endpoints for "Subscribe with Dombox" button.
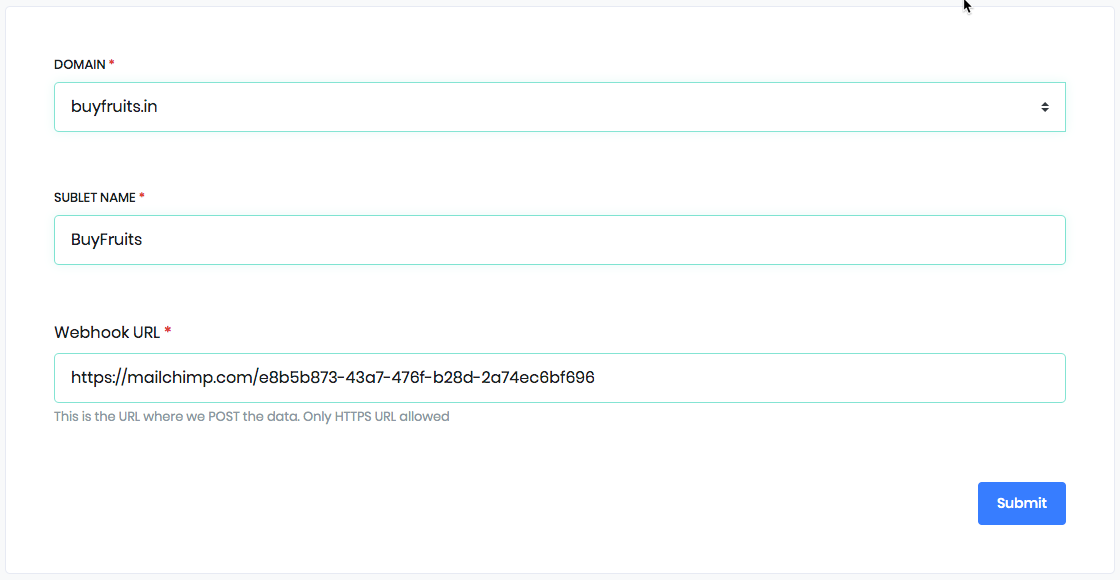
A domain can have multiple sublets. You can add sublets only for the verified domains.
Just add a Sublet and Provide the webhook URL where you want us to POST events.
e.g. https://mailchimp.com/e8b5b873-43a7-476f-b28d-2a74ec6bf696
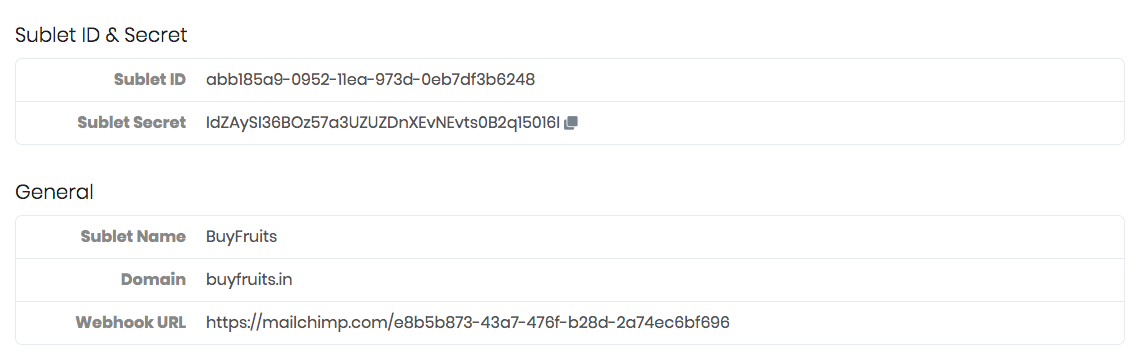
Copy Secret
Copy the "Sublet Secret".
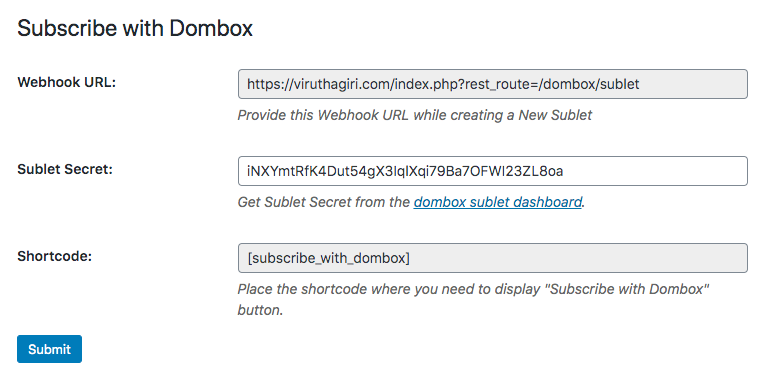
Configure endpoint
We offer plugins for popular software like wordpress. Install and configure
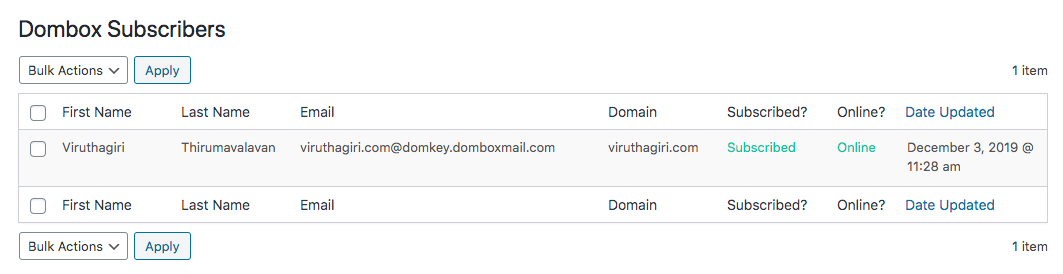
View Subscribers
When a user click "Subscribe with Dombox" button, we capture the event, create a dombox for your domain, and then we POST the subscription events to your endpoints.
You can view them in your app dashboard.
Handle Events
We sign all the events we send to your endpoints.
We generate a signature using HMAC and SHA-256.
The signature will be included in the header as "X-Dombox-Signature".
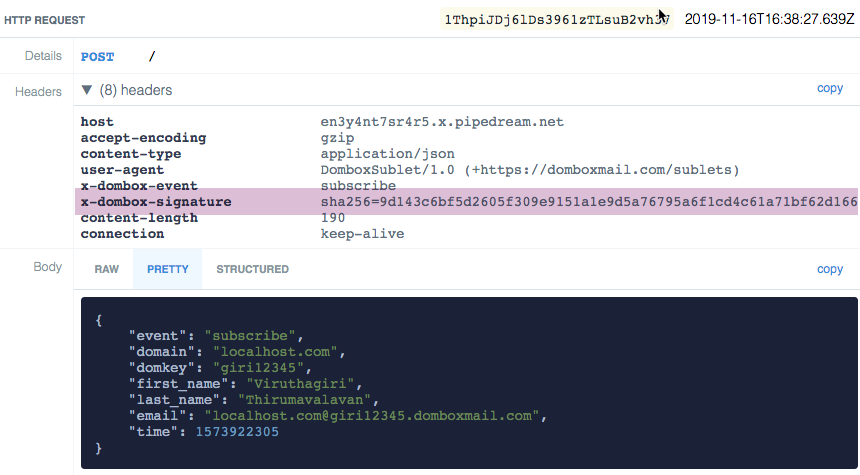
Extract the signature and verify it to make sure the data is really coming from us.
Here is a sample code for PHP language
                        <?php
                        $secret = "Sublet Secret goes here"
                        $payload = file_get_contents("php://input");
                        if ( hash_equals('sha256=' . hash_hmac('sha256', $payload, $secret),
                                          $_SERVER['HTTP_X_DOMBOX_SIGNATURE'] ) {
                            // We have a valid payload. Process the event.
                        }
                        ?>
After signature verification, handle the POST request. That's all.